Your screen is calibrated once, then used for both methods.
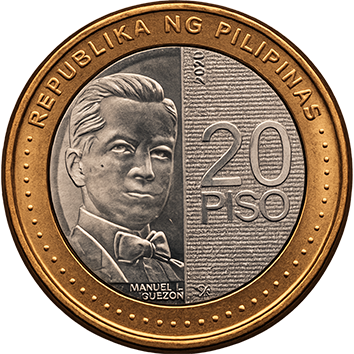
Screen calibrated with a ₱20 coin for better accuracy.
Screen calibration
Calibrate with a ₱20 coin
Place a real ₱20 coin on your screen. Use the slider until the green circle matches the coin’s outer edge.
smallerlarger
Stop sliding when the green circle lines up with the coin’s outer edge all the way around.
Don’t have a ₱20 coin? You can still continue. We’ll help confirm your final size before crafting.
Calibration is recommended for better accuracy on Android, iPhone and other screens.
Step 1 of 2
Use a ring that fits well
You'll lay it flat on your phone screen. This gives a helpful estimate, not a guaranteed exact size.
01
Place your ring
Lay the ring flat on your phone screen. Keep the ring centered over the guide.
02
Adjust the circle
Drag the slider until the ring opening matches the green center.
03
Confirm the estimate
Tap confirm when the green center aligns evenly with the ring opening on all sides.
A helpful estimate, not a perfect measurement
Best used on a mobile phone. Screen sizes and browser settings can affect on-screen measurements. Use this as a guide, then confirm your size with us before crafting.
Step 2 of 2
Place your ring over the gold ring · match the inner opening to the green center
-
diameter
smallerlarger
Your estimated ring size
US size
-
Screen not calibrated. This is a rough estimate. We’ll help confirm your final size before crafting.
String method
Measure with paper
Cut a thin strip of paper, wrap it around your finger, mark the overlap, then measure the length in mm. This gives a helpful estimate before final size confirmation.
Screen not calibrated. The ruler may be less accurate on some devices.
1
Cut a thin paper strip ✂️
Cut a narrow strip of paper around 5 to 8 mm wide. Make sure it is long enough to wrap around your finger comfortably.
2
Wrap it around your ring finger ☝️
Wrap the strip around the base of the finger where the ring will sit. Keep it snug, but not tight. It should still slide over your knuckle.
3
Mark the overlap point ✏️
Use a pen to mark the exact spot where the end of the strip meets the rest of the paper. This mark is your finger circumference.
4
Measure the strip in millimeters 📏
Lay the strip flat on the ruler. Start the left edge at 0, then read the number where your mark lands. Enter that number below.
Use the on-screen ruler
Open the fixed ruler, place the paper strip directly on your phone screen, then return here and enter the measurement.
Enter circumference
Enter the marked length in millimeters (mm)
US ring size
-
We’ll still help confirm your final size before crafting.
Size chart
US size
Diameter mm
Circumference mm
Measure more than once for a better read. Between sizes, we usually recommend going up. Quarter sizes may also be available.
Place your paper strip beside the green line. Align the first mark at 0 mm, then scroll down as needed to read the second mark.
This ruler shows the full 0–80mm scale. Scroll down if needed. Do not zoom the screen. Best used on a mobile phone.
Important note
This tool gives a helpful estimate.
It is not a 100% perfect or guaranteed ring measurement. It works best on a mobile phone. Browsers do not always know the exact physical size of every screen, so small differences can happen.
For best results: measure more than once and use a ring that already fits the correct finger.
For paper strips: keep the strip straight, snug and flat. Avoid pulling too tight.
Before crafting: vanya Jewelry will still help confirm your size so your piece is made with care.